Friday, December 31, 2010

Happy New Year!

I wish all of you a wonderful and prosperous New Year.

I hope we all find a little extra time to do the things we love, spend more time with friends and loved ones, continue to dream, and create beautiful memories.

Many blessings to you and your families,

Tatteristic!

Tuesday, November 30, 2010

Still Tatting

I feel bad that I've missed writing almost two months' worth of tatting posts to my blog. It's been a very busy time and I didn't have much to show. I hope you'll forgive me this one time.

We've been on vacation twice this year. Each time I took my tatting with me but didn't accomplish very much. Then it got crazy busy at work, and don't even get started on how many family birthdays there are this time of the year.


Enough excuses, I'm back and I'm still tatting.

When I saw Laura Bobay's beaded wreath on Tat-Man's (aka Mark Myers) website, I knew I just had to make it. The only Christmas green thread I have is size 10 and it was too big for my taste so I found a leafy green Lizbeth thread in size 20 that I liked much better. I hope Tat-Man and Laura won't mind that I didn't actually do both rounds. After I finished the first round, I like it so much that I included it in my In-Tatter's Christmas Exchange package. I'm starting another wreath and this time I promise to do both rounds. The wreath was needle tatted and has clear seed beads between the large rings. If you click on the photo, you'll see the full-size picture.

I've also been crocheting some baby beanie hats and making some large tote bags for gifts. So you see, I really have been busy at a combination of all things crafty.

I hope everyone enjoyed the Thanksgiving holiday and you're looking forward to the Christmas season.

(Revised 11/30/10 to include Laura Bobay's name as the designer of the beaded wreath.)

Thursday, September 30, 2010

A Little Tatting Here & There

I don't have any new pictures to post of tatting, but I have been working a couple of things - not just tatting. I've been sewing quite a bit lately and made some baby gifts for an adorable little girl born in August. I made her mom a nursing cover and she received a pink quilt and taggie blanket.


Believe it or not, they are made out of the same fabric so they match exactly. I'm not sure what's going on with these pictures - must've been different lighting when photos were taken.


Cluny tatting still eludes me. I've been practicing with different size threads and am still not able to be consistent enough. I've used both a shuttle and needle for practice and sometimes my petals look nice and sometimes they are just a mess.

As with anything that is new, I know it takes a lot of practice and I will continue to practice my Cluny leaves. However, they can be a little frustrating so I will be tatting other things in between.

I'm working on the Amusement Doily right now with a new Lizbeth #40 thread and I'm loving it. I want to make a few more snowflakes so I bought another ball of white thread just for that.

Wednesday, September 1, 2010

Tatting Snowflakes for the Holidays

I posted these on my 25 Motif Challenge blog but I also wanted to post pictures here so that everyone can see what I've been working on.


I tatted the first one on vacation and the second one right after we returned because I thoroughly enjoyed the patterns in Lene Bjorn's 24 Snowflakes in Tatting book.

There are 22 more in this book that I want to try and complete between now and the holidays.

Saturday, August 21, 2010

A New Toolbar for Tatteristic!

I'm testing a new toolbar which you'll notice at the bottom of your screen.

It's free from Wibiya.com and has a ton of features for sharing, communicating, and monitoring your blog or website.

There are many additional options for sharing photos and posts and keeping in touch via all kinds of social media.

I still want to add some features but I wanted to get it installed and give it a try.

Please let me know what you think about it. I'm always looking for new ways to share info and improve communication.

Wednesday, August 11, 2010

Shepherd Hook Bookmarks

There was a question from Tatknot in a comment to my last post. I had mentioned wanting to make some shepherd hook bookmarks and she wondered what they looked like.

Here's a picture. They are about 5" long and flat so they slip nicely into a book without any bulk added when the book is closed.


You've probably seen something similar but called by a different name. Here's what it looks like inside a book.


The motif is just a simple clover pattern with a charm. I found the hooks at Joanns and they only cost about $1.50 or so.

Thanks for asking about them. I'm sure others wondered what I was talking about too!

Getting Back into Tatting

We're back from vacation and I'm looking forward to spending many evenings tatting. I've missed it.

I did manage to do a little tatting while on vacation and finished a pretty snowflake. As I was tatting on the plane, at the airport, or during the cruise, many people stopped and asked what I was doing. I explained that I was tatting and showed them my work. I took a bunch of small butterflies and gave them to everyone who inquired. All of the butterflies were much appreciated but I realized I would have liked to have had something a little larger to give to people.

I think I will make up some of the shepherd hook bookmarks with the hanging motif and give them to anyone who asks about tatting. They are a little more substantial, not so easily misplaced, and could even be re-gifted to friends or family if desired.

More to follow. I will post some pictures as soon as I can.

Wednesday, July 28, 2010

Tatting on Vacation

We are in Alaska. I brought a lot of tatting with me to work on thinking there would be quiet times when I would want to tat. So far, we've been so busy that I haven't even taken it out and looked at it.

However, we did have a three hour flight to Anchorage and I was able to get it out and do a little work. The lady next to me told me her grandmother tatted but no one else in her family learned how to do it. I gave her a butterfly that I brought with me. I was thinking about leaving tatted bookmarks and other motifs as thank-you gifts to the hospitality staff throughout our trip.

Yesterday it was a clear, sunny day as we rode the train to Denali. Today I think it will probably rain. We're planning on taking the Natural History Tour today and won't get back to the lodge until 11:30pm. It's amazing that it stays light outside that late!

Thursday, July 8, 2010

Learning to Make Cluny Leaves

With much thanks to Mimi Dillman and Elisadusud, I think I finally figured out how to tat cluny leaves!

I watched the videos over and over and read the instructions step by step and slowly made some progress. Thank you to everyone who suggested tutorials - they were very helpful.

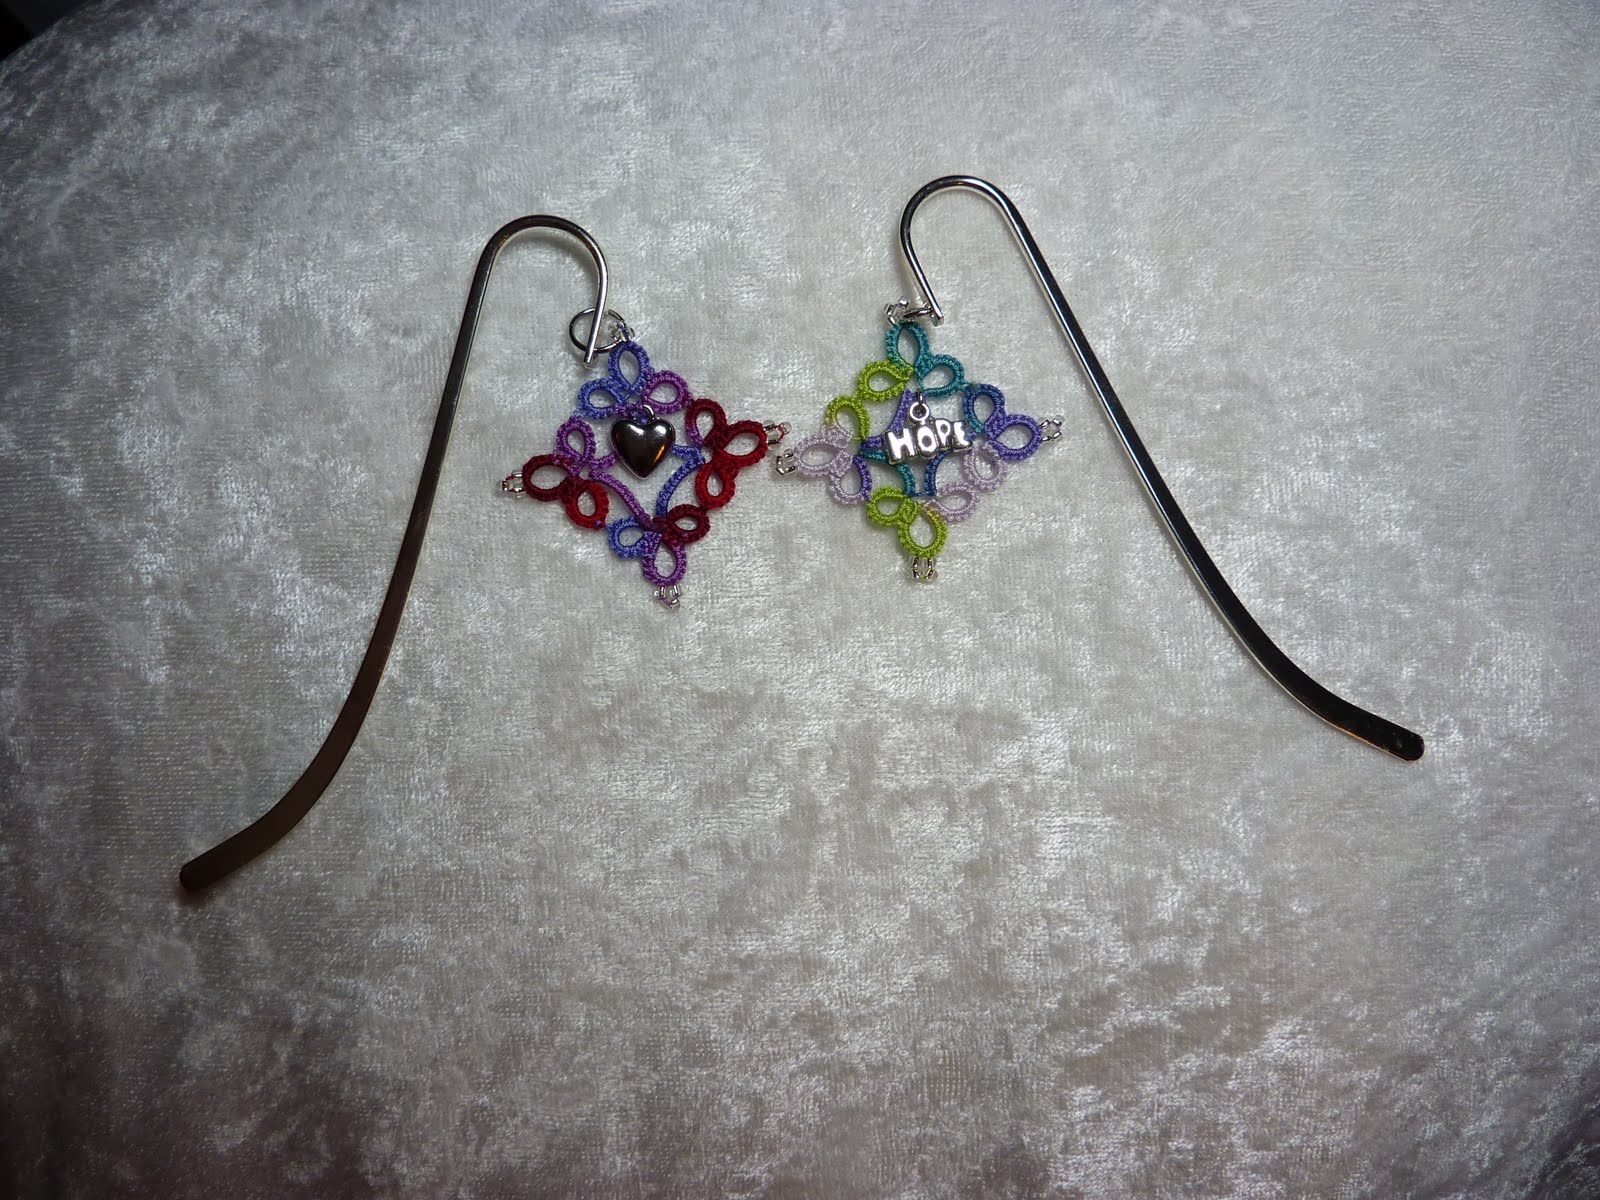
Here are my first two attempts (that were worth photographing!). The same No. 10 thread was used for both. The top pair was shuttle tatted and the bottom pair was needle tatted. (Clicking on the picture shows more detail.)


I wanted to be sure I could both shuttle and needle tat these because I switch back and forth between the two styles depending on what I'm making.

For anyone who is interested, I found the technique to be the same for both shuttle and needle.

However, just for learning the technique of how to make cluny leaves, you don't really need a shuttle or needle. For me, wrapping my loom hand required the most practice. Passing the shuttle or needle or just the thread by itself, was the easy part. Closing the cluny leaf requires pulling on the threads to tighten up the leaf and as long as you've read the instructions or watched videos and know which threads to pull first and last, that part of the technique just requires a little patience.

You need enough open space in the 'loom' hand to pass the shuttle back and forth. If needle tatting, the open space can be much smaller. Tension using either method is the very important and at first your 'loom' hand gets tired and cramped. I relaxed my fingers without even noticing it which made the passes back and forth rather loose and sloppy.

I'm not sure why the shuttle tatted clunies have sort of a right-angle bend at the beginning of the second leaf. Perhaps I twisted the thread after the chain? I'll have to keep any eye on my next set and see if it happens again. If anyone knows what I did that caused this, please let me know.

Well, now that I have the feel of how to tat cluny leaves, I can safely say that many more practice sessions are in order to work on consistency and symmetry.

Because I struggled to learn this technique, I wrote down my own instructions along with a few pictures for future use. I don't want to forget what I did a few months from now if I put it aside for other tatting and try to come back to it later!

As soon as I have finished a motif with cluny leaves, I'll post pictures here and add it to my 25 Motif Challenge.

Don't you think cluny leaves would look fantastic as part of some crazy quilting? I do.

Now it's time to practice, practice, practice.

P.S.
If you've been hesitant like I was to learn how to tat cluny leaves, or tried before and gave up, I say give it another chance. They are beautiful in all of the tatted pieces I've seen and I'm glad to be able to add them to my list of tatting accomplishments.

Tuesday, June 29, 2010

Catching Up On All the Tatting Blogs

I've been tatting away on various projects but none of them are very inspiring right now. I've started and stopped a number of times and just can't seem to decide what I want to work on next.

When all else fails, I tat little butterflies or other small motifs to use up thread left on shuttles. I guess I think if I have empty shuttles, I'll be ready to fill them with beautiful thread for the next tatting project.

Since I haven't figured out what I want to work on, I decided to catch up on all the tatting blogs. Everyone is making such beautiful tatted items and that inspires me. Thank you tatters for posting and sharing your work.

I think I'll check out my pattern books and look online and try something I've never tatted before. One technique that seems very popular right now is cluny tatting. So far I have failed miserably at making clunies so I will look for more info online and perhaps some new videos and give it a try.

Any suggestions on where I might find instructions for making clunies? Videos are great because I'm very much a visual learner. It reminds me of learning to make split rings and split chains. I tried and tried and tried and finally the light went on and I got it. I'm hoping for the same reaction to making clunies!

Tuesday, June 15, 2010

Word of Caution About Blog Comments

Some of you may already know this, but I just recently figured out something about comments.

I love reading all the comments other tatters leave on my blog but I don't publish them without looking at them first, and this is why. I've been involved in the tatting community for almost two years and am pretty familiar with many names and bloggers but I don't know everyone. While I'm not afraid of a few negative comments here and there, I am very cautious about spamming and other malware that is prevalent everywhere now.

As I was looking as some of the comments I've received, one trend I noticed was after that after a very innocent comment there were a bunch of underlined dots. I didn't immediately recognize the name and wondered why there were 10-15 dots at the end of the comment.

Now, I admit, I often end my sentences in email or when texting with 3-4 dots...it's kind of my way of letting the recipent know that my comments are open-ended and hopefully they will reply with further thoughts or information.

What was interesting about these comments was when I hovered my mouse over the dots and looked at the bottom of my browser screen, all kinds of trashy website URLs came up!

Spammers have figured out a way to create links using this method.

So, fellow tatters, be wary of unknown bloggers or odd comments you see on your own blogs and check them out (hover don't click) before publishing.

Just my two cents' worth but I hope it helps someone.

One more thing - if you receive comments in a foreign language, copy them into a translator (Google has one) before you do anything else. You'll be surprised and probably disappointed in what some of them say...

Friday, June 11, 2010

2010 Tat Days Quilt Block

Not very long ago, I volunteered to finish a quilt block for the 2010 Tat Days put on by Palmetto Tatters Guild. Here's a photo of the quilt block I received:


Well, I looked and looked at the block trying to decide what sort of crazy quilting/tatting I would add. I tatted up some edgings and tried them out; some I kept; some I did not. I tried a number of different single motifs to fill the 'center' area but finally ended up tatting a rose motif for it. I added some butterflies with beads; more tatted edgings; and even a little lace with buttons, and this is what it looked like when I sent back to Georgia.

If you double-click on the photo itself you'll be able to see much more detail.

It was fun to work on and inspired me to practice some embroidery stitches for future projects. I'm looking forward to seeing the finished quilt and I can tell from the other blocks I've already seen, that it will be a huge success!

Thursday, June 10, 2010

Big and Small Tatting

As one of my 25 Motif Challenges, I tatted a doily. Even though I was afraid I might get bored doing a doily, I actually found it to be quite fun and kind of relaxing to tat. Some of the rounds were repeats of previous rounds so there were easy tatting times.

It's called a Clover Leaf Doily by Linda S. Davies and I found the pattern at www.craftown.com. It's about 6.5 inches across and was shuttle tatted in Lizbeth #20 thread; a medium leaf green and ecru.


After finishing the doily and while I pondered which tatting project I would start next, I decided to tat up some butterflies. I decided it would be fun to make teeny, tiny butterflies since I had just finished a large project.

These butterflies are all needle tatted and less than 1/2" across. I used a pretty pink Sulky Rayon thread; an ivory hand quilting thread, and blue outdoor UV resistant thread. Quite an interesting array of thread I have on hand, don't you think?


What should I tat next? I still haven't decided...but I'm thinking about doing something with cluny leaves since I've never done them before. I'll keep you posted.

Wednesday, June 9, 2010

Love to Tat

I don't know about you, but after a long day at work, I really look forward to spending a little time tatting.

There's just something wonderful about picking out a new pattern (or sometimes an old favorite), searching through thread for just the right one, winding the shuttles (or even threading the needles), finding something good to watch on TV and settling in for an evening of tatting.

I can't wait to get home and start tatting!

Wednesday, June 2, 2010

Back from Vacation and Tatting Again

I’m still here. I know it’s been weeks since I last posted anything but, what can I say, it’s been a busy couple of months around here.

My husband and I had two four-day vacations. The first was a long weekend in Williams, Arizona, with a visit to the Grand Canyon. This was a well-planned motorcycle trip with lots of scenic roads and a little sightseeing along the way. Unfortunately, the weather turned bad the day we left San Diego. It rained and snowed in the mountains and the roads were quite treacherous.

We had a group of almost 20 motorcycles when we left San Diego and had three motorcycles tip over on the icy roads. Everyone was able to get back up and keep riding but the first day was non-stop rain, sleet, and snow for 12-1/2 hours - all the way to Williams, Arizona.

Friday was spent at the Grand Canyon; another cold and wet day but the Grand Canyon is awesome and we all enjoyed seeing it. Saturday was absolutely gorgeous – the perfect day for riding. We left Williams early that day and headed south through Oak Creek Canyon, Sedona, Jerome, and stopped in Wickenburg.

On the way back to San Diego on Sunday we stopped at Lutes Casino in Yuma – a fun and interesting restaurant featuring potato tacos. Just to give you a better idea of the weather we encountered during these four days; the lowest temperature on Thursday was 28 degrees and the highest temperature through the desert on Sunday was 98 degrees!

Our second long weekend involved flying up to Reno for some very important training. My husband and I both ride Harley-Davidson motorcycles and we’re also officers in our local motorcycle chapter. Every year Harley-Davidson puts on four training seminars in the United States for officers of local chapters and we were lucky enough to be able to go to the West Coast seminar in Reno. There were 700 bikers there from all over the United States and we shared stories about our local chapters and learned a lot from each other about making our own chapters more inviting and more fun. It was a very busy month for us but a lot of fun.

Well, enough about our weekend adventures. More about tatting in my next post.

Sunday, April 18, 2010

Interesting Set of Events

This morning on my way to church, I noticed an accident that had just happened on the other side of the freeway. No emergency crews had arrived yet but there were 4-5 cars that pulled over to help. As I do when I see accidents on the road, or hear emergency vehicles nearby, I offered up a quick prayer for the person(s) in the car, the people who stopped to help, and the emergency crew that would be there soon.

I found out later that morning that one of the people who stopped to offer assistance was my son. He's an EMT/Firefighter and had just gotten off work. The accident happened just in front of him and he stopped to help.

The car had veered off the freeway and rolled over when the driver fell asleep at the wheel. The driver only suffered minor injuries and is okay.

Now, as I think back to the picture in my head, I can remember seeing a large silver truck along with the other vehicles that had stopped to help. It never occurred to me that it could be him but I'm thankful that it was and that he was able to help.

Saturday, April 10, 2010

The Tatting Player's Earrings

If you haven't seen her post yet, check out The Tatting Player's earrings that Iris is going to help us create beginning on Monday.

I just finished my very first piece of tatted jewelry which was a pendant for the InTatter's exchange, so I'm excited about learning how to make earrings.

Pendant for Valerie (InTatter's April Exchange)

Pendant plus extra motifs attached to bookmarks

Because I loved this motif so much, I also made a couple extra and attached them to lightweight metal bookmarks called shepherd's hooks. It only takes about an hour or so to tat these motifs up so they're very fun and fast to do. In the pictures the bookmarks look a little like earrings but they're about 5" long and flattened to fit between the pages of a book.


I used a simple clover leaf and chain and attached a small charm at the bottom of one of the clovers. All of these motifs are done in #20 Lizbeth thread. The colors are Western Sunset and Springtime.

Monday, March 29, 2010

Work Inspired by Tatting Shuttles

I find it interesting that different shuttles inspire me to do different types of motifs. I should probably say right here that I only have three different types of shuttles: Clover, Aero, and Pop-A-Bobbin.

For some unknown reason, the only shuttles I can find locally are the plastic Clover shuttles. I have come to love these shuttles because they're comfortable and have a fantastic tip on one end.

I have purchased several Aero shuttles and also love working with them. I like the fact that the bobbin is removable/interchangeable and, again, the Aeros have a wonderful tiny hook on the end. However, I thought they were a little too long so I asked my husband to snip off the extra plastic on the back tip of them and now they're perfect for me.

I recently splurged and purchased a Pop-A-Bobbin shuttle and absolutely fell in love in love with so it quickly that I've asked to be put on the waiting list to get another one. This shuttle is a little bit bigger and heavier than the other two shuttles I use but it didn't take any time at all to be completely comfortable with the differences. I actually really like the fact that it is a little heavier than the others. The little indentation where the bobbin plug goes makes it easier to hold onto and the shuttle doesn't slip out of my hand - an unexpected benefit.


Anyway, I almost always use the Clover shuttles when I'm trying out a new pattern or technique. I'm just very comfortable with it and it is often the first shuttle I reach for.

When I use the Aero shuttles, I usually pick projects that I will be traveling with. The hook is built into the tip of the shuttle so I don't need to carry an extra crochet hook, and I can easily carry an extra bobbin or two in case I need more thread.

What I've found with the Pop-A-Bobbins shuttles is that they are fantastic for edgings. These shuttles hold a ton of thread and, like the Energizer Bunny, I just keep going and going and going...

Sunday, March 28, 2010

Spinning My Wheels

Do you ever feel like you're spinning your wheels? I do.

I feel like I've been productive with my crafts and tatting and yet I don't really have anything to show for all the time I've spent working them. How can that be?

Maybe it's because I've done a little bit on many different projects. Let's see what I've done...

(1) Add some edgings and embellishments to a crazy quilt block; (2) Practice tatting several small motifs to use in a pendant exchange; (3) Shop for findings and embellishments to add to my pieces; (4) Work on burp cloth edging and Filet Panel by Mary Konior, Tatting with Visual Patterns; and (5) Cut out and begin sewing a couple of large tote bags for friends.

I guess I have been more productive than I thought!

 Testing some half-closed rings for crazy quilt embellishment


Filet Panel from Mary Konior's Tatting with Visual Patterns (unblocked)


Edging on second burp cloth (triple crochet then double crochet around edge)


What have you been working on?

Wednesday, March 10, 2010

Tatting on Crazy Quilt Blocks

I know, I haven't posted any pictures of my tatting lately. I've been tatting away but I don't have any completed items to take photos of just yet. I've been working on a couple of Mary Konior patterns which I just love.

Lately, I've been drawn to edgings. Probably because I've also been doing some crazy quilting. You can purchase beautiful edgings but I prefer making them myself to add to the blocks. The tatted edgings and motifs don't require much as the blocks themselves are usually only about 10-12 inches square. It's pretty easy to work up a length of edging to fit a section of the quilt block. Many times you only need a few inches to cover a seam.

Easy ring and chain motifs can be done in all sizes. All types of thread and embellishments like buttons and pins can be used on or near them to highlight their presence on the block. Here are some plain white test ideas I was trying out.


Using BTS (bare thread space) in tatting opens up all kinds of new possibilities. You can weave a pretty ribbon or strand of beads through the BTS and create lots of pretty designs. I've even found a way to spice up plain old rick-rack so that it looks completely different than you imagine it would.

I have a sewing machine that does a lot of different stitches but I also enjoy doing hand embroidery so I may use some of the stitches for inspiration but completely change them up and add to them just for the fun of it.

As soon as I finish the current quilt block I'm working on, I'll post a photo of it.

Crazy Quilt Blocks + Tatting = joining old knots and stitches together for a new twist (well, for me anyway)

Wednesday, February 24, 2010

Butterfly Tatted Using Both Needle & Shuttles

I've been working on a butterfly and was surprised at how much trouble I had selecting just the right pattern. I love all the little butterflies that you can make to use up extra thread on a shuttle, but I was looking for something with a little more substance. I wanted to challenge myself and be able to post it on the 25 Motif Challenge as well as send it off to it's new home.

I finally decided on the Green Butterfly pattern by Martha Ess - yep that's the name of the pattern. I chose some pretty Lizbeth thread and started tatting. If you've read the post about this butterfly on my 25 Motif Challenge blog, you know that I used both shuttles and needles to tat it.


Once I selected which thread to use, I wound my shuttles CTM to get started. When I read the pattern, I realized that the center rings are the first sections to be tatted. Well, I had already wound my thread for the larger sections of the wings and didn't want to have to cut it and start the wings with two ends to hide.

That's when I decided to needle tat the center green rings. It worked out great and I didn't have any extra ends to hide on the larger sections of the wings.
 
There was a challenge to completing the butterfly because there are five sections to be joined together. Even though the pattern directions are clear and easy to follow, I somehow always manage to flip things the wrong way or join something upside down. Joining sections or smaller motifs into a larger piece is definitely something I should continue to practice.

The butterfly is actually rather large compared to the pieces I've been tatting. It's about 5" wide and 4" tall and if you click on the picture, you'll get an idea just how big it is. At the bottom of the picture, I included the colors of thread used.

Now the butterfly is complete and it's been blocked and photographed, so I'm sending it to the Palmetto Tatters Guild as my membership fee for the 2010.

[Note: 3/2/10 added link to Green Butterfly pattern]

Sunday, February 7, 2010

Superbowl Tatting

I wanted to watch the Superbowl game today and tat but I didn't want to start anything that required a lot of concentration. While surfing the web one day I came across these adorable burp cloths and baby blankets that are hemstitched and ready to be edged from Ammee's Babies. It was the perfect project.


The burp cloth is really soft flannel about 8" x 18" and because they are already hemstitched, all I did was crochet around the edge once and then add a tatted chain (3-3-3) to finish it off.


I enjoyed the game and was able to finish a cute little project without having to do any untatting today!

Monday, February 1, 2010

Introducing Norman, the Rooster from California

I would like to introduce you to Norman. He's a beautiful rooster born and raised in California.

Norman was a wonderful  Tat It And See pattern created by Jane Eborall. For 11 days Jane taunted and teased us with small portions of the pattern to tat Norman. When we began, we had no idea what he would turn out to be. All we knew was that we needed three coordinating threads, a small bead, and time to have lots of fun!


Jane does a fantastic job with T.I.A.S. and not only provides the pattern, she includes helpful tatting tips and techniques about joining threads, adding beads, and other ideas along the way.

Once Norman was completed, Jane even provided patterns for the rest of his family, his chickee wife Aileen, and their two chicklings.

Thank you Jane. I'm already looking forward to the next T.I.A.S.

Note: I changed photos because I thought the first one was too dark 02/03/2010

Wednesday, January 20, 2010

Retro Tatting Mistakes

On Sunday, I was working on my T.I.A.S. motif which, by the way, I am thoroughly enjoying, when I noticed that I had made a huge mistake.

Here's what happened. I'm going along smoothly following the instructions for Day 6. It's time to add the third thread color on the chain shuttle. No problem. I've done that before. I add in my new color, hide the ends as instructed, and cut the old chain thread.

Unfortunately, after I added the new color I forgot to make sure my work was reversed and that I was going the right way. I was not using the new color for the chain and the chain was facing the wrong way. I started calculating how far back I would have to cut to fix my error. I was doing so well up to this point and I really didn’t want to have to start that section again. So I figured out a way to cheat a little and not have to cut out anything!

I un-tatted the chain that was the wrong color and facing the wrong way. There was only about an eighth of an inch of thread hidden under the double-stitches and I wasn’t sure how I would be able to hold onto to it and feed it into a new chain.

Then suddenly I had an idea. I put the teeniest bit of glue on the thread end and let it dry. It was a little bit tacky which made it possible to re-tat the new chain in the correct color over it without losing the old end. This isn’t something I would recommend doing all the time but it worked in this instance and I was able to continue tatting!

Ahhhh, Day 6 complete.


Tuesday, January 19, 2010

Have You Tried The Magic Thread Trick?

If you haven't tried it yet, think about using the Magic Thread Trick to hide ends. Here is a link to Debbie Drakes instructions via Georgia's website that is very helpful. You can find lots of helpful websites if you Google this topic.

I've been trying to use it more often and find that when I remember to start a motif with it, I enjoy getting to the end because I know all I have to do is pull my thread ends through, clip and I'm done.

I also tend to tat very tightly so sometimes I had trouble pulling two threads through. If that happens to you, just do the Magic Thread Trick twice (say that fast three times) and pull each thread end separately instead of both together when you get to the end.

Monday, January 18, 2010

Tatting Update

I have been tatting up a storm. I am still working on my 25 Motif Challenge as well as some homework from Georgia’s online tatting class and Jane’s T.I.A.S project. As I’ve already mentioned in previous posts, my goal this year is to learn some new techniques.

Georgia's online tatting class has been about mignonettes and netting for the last couple of weeks and some of the work we’ve seen is just beautiful. I’m going to try Gina’s Netted Heart. Hopefully, my end result will match the picture.

We’ve been doing split rings, shuttle and thread switches, and adding a bead in the online T.I.A.S. and I never thought so much tatting would be so much fun. While I keep guessing, I have no idea what motif Jane has in mind for us but one thing I’m sure of is the ‘fun factor’ is definitely happening!

Today has been kind of a cold, windy, rainy day – perfect for sitting in front of the fireplace and tatting. I think I’ll start on some of the homework from the online tatting class.

Thursday, January 7, 2010

Request for Bag/Tote Patterns

I've had a couple of requests for the patterns I used for the bags.

The crazy quilt bag with the tatting embellishment is called #ps026 Mini Bow Tucks by Penny Sturges. The size is 11" wide by 10" tall by 5" deep. I purchased this pattern at a quilt store, The website is listed as www.quiltsillustrated.com.


The pattern is not a 'crazy quilt' pattern; I did that part myself simply by sewing together strips of fabric in a random crazy quilt kind of way.

The brown and green floral totes were made from a Simplicity pattern, #2685. It measures 17" x 19" and could easily be used as a diaper bag, beach bag, or just about anything else.I used a home decor type of fabric with a canvas lining to make it very durable.

If you make any purses, please post a picture and let me know. I'd love to see them.

Crazy Quilt Bag With Tatting

I just finished making three bags, one of them has some of my tatting motifs on the front. The pattern for the bag itself was easy to put together but it took a couple of extra days to do the crazy patchwork fabric piecing and adding all of the embellishments. It was fun and turned out to be really cute.

The ribbons on each side of the bag can be tightened.

 Embellishments include tatting, beads, buttons, stitching and ribbons.
 
 A closer look at some of the embellishments.


This is the back of the bag with a pocket and button closure.


The other two bags are late Christmas presents. They're both made out of the same pattern and they were super easy to sew. Since I've given both of them away and I liked the bags so much, I bought some fabric to make one for myself. It's hard to tell but these bags are actually a pretty good size and have an inside zipped pocket for storage. I folded up a bath towel and stuffed it inside when I took the photos and there was still room to spare.


There is some decorative stitching below the band and I just love the big wooden buttons.


Now that Christmas 2009 is completed, I can start thinking about new projects for 2010.

Tuesday, January 5, 2010

TIAS 2010 Begins

Yippee! Jane Eborall's Tat It And See begins today. I've included a link to take you straight to her TIAS blog.

I did one of these last year and it was so much fun. Jane provides a ton of helpful tatting information during the TIAS and tatters enjoy guessing what it is throughout the whole process. Here's a link to the TIAS Introduction page.

If you haven't done a TIAS yet, and even though I've only done one since I began tatting, I encourage you to give it a try. It's a blast!