Wednesday, August 11, 2010

Shepherd Hook Bookmarks

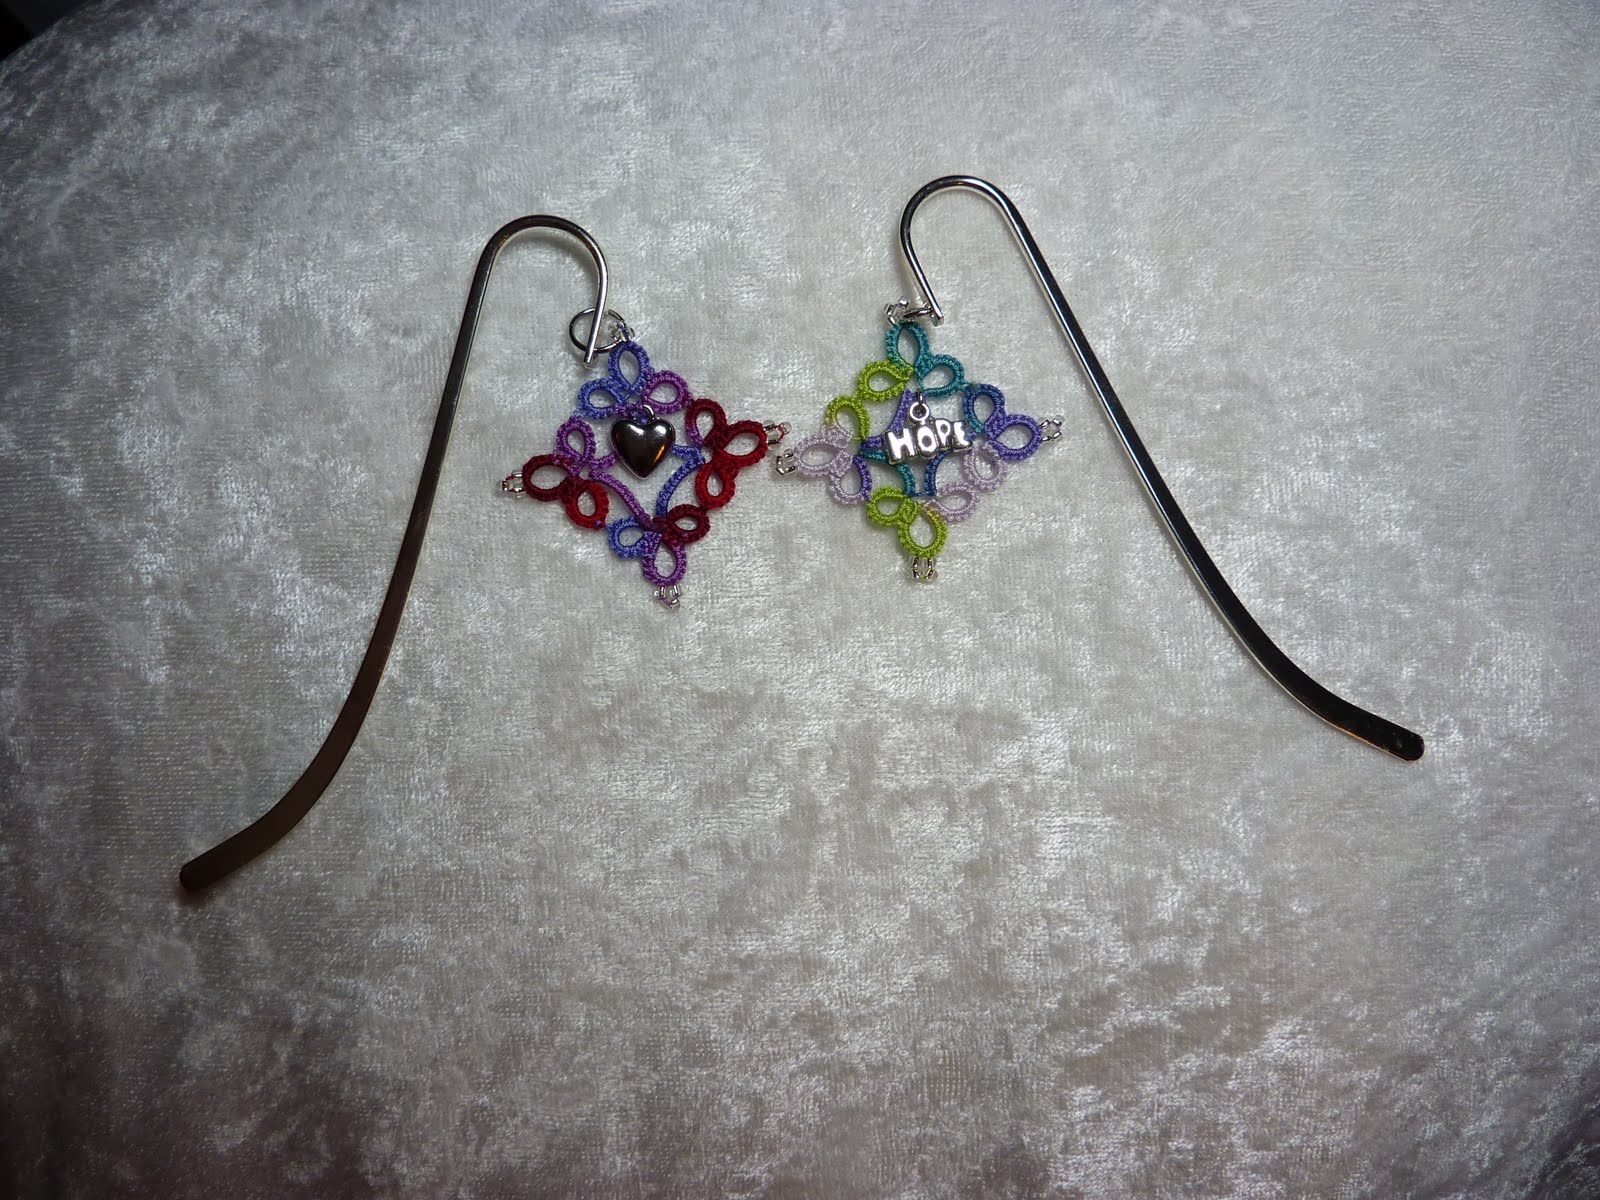
There was a question from Tatknot in a comment to my last post. I had mentioned wanting to make some shepherd hook bookmarks and she wondered what they looked like.

Here's a picture. They are about 5" long and flat so they slip nicely into a book without any bulk added when the book is closed.


You've probably seen something similar but called by a different name. Here's what it looks like inside a book.


The motif is just a simple clover pattern with a charm. I found the hooks at Joanns and they only cost about $1.50 or so.

Thanks for asking about them. I'm sure others wondered what I was talking about too!

Getting Back into Tatting

We're back from vacation and I'm looking forward to spending many evenings tatting. I've missed it.

I did manage to do a little tatting while on vacation and finished a pretty snowflake. As I was tatting on the plane, at the airport, or during the cruise, many people stopped and asked what I was doing. I explained that I was tatting and showed them my work. I took a bunch of small butterflies and gave them to everyone who inquired. All of the butterflies were much appreciated but I realized I would have liked to have had something a little larger to give to people.

I think I will make up some of the shepherd hook bookmarks with the hanging motif and give them to anyone who asks about tatting. They are a little more substantial, not so easily misplaced, and could even be re-gifted to friends or family if desired.

More to follow. I will post some pictures as soon as I can.

Wednesday, July 28, 2010

Tatting on Vacation

We are in Alaska. I brought a lot of tatting with me to work on thinking there would be quiet times when I would want to tat. So far, we've been so busy that I haven't even taken it out and looked at it.

However, we did have a three hour flight to Anchorage and I was able to get it out and do a little work. The lady next to me told me her grandmother tatted but no one else in her family learned how to do it. I gave her a butterfly that I brought with me. I was thinking about leaving tatted bookmarks and other motifs as thank-you gifts to the hospitality staff throughout our trip.

Yesterday it was a clear, sunny day as we rode the train to Denali. Today I think it will probably rain. We're planning on taking the Natural History Tour today and won't get back to the lodge until 11:30pm. It's amazing that it stays light outside that late!

Thursday, July 8, 2010

Learning to Make Cluny Leaves

With much thanks to Mimi Dillman and Elisadusud, I think I finally figured out how to tat cluny leaves!

I watched the videos over and over and read the instructions step by step and slowly made some progress. Thank you to everyone who suggested tutorials - they were very helpful.

Here are my first two attempts (that were worth photographing!). The same No. 10 thread was used for both. The top pair was shuttle tatted and the bottom pair was needle tatted. (Clicking on the picture shows more detail.)


I wanted to be sure I could both shuttle and needle tat these because I switch back and forth between the two styles depending on what I'm making.

For anyone who is interested, I found the technique to be the same for both shuttle and needle.

However, just for learning the technique of how to make cluny leaves, you don't really need a shuttle or needle. For me, wrapping my loom hand required the most practice. Passing the shuttle or needle or just the thread by itself, was the easy part. Closing the cluny leaf requires pulling on the threads to tighten up the leaf and as long as you've read the instructions or watched videos and know which threads to pull first and last, that part of the technique just requires a little patience.

You need enough open space in the 'loom' hand to pass the shuttle back and forth. If needle tatting, the open space can be much smaller. Tension using either method is the very important and at first your 'loom' hand gets tired and cramped. I relaxed my fingers without even noticing it which made the passes back and forth rather loose and sloppy.

I'm not sure why the shuttle tatted clunies have sort of a right-angle bend at the beginning of the second leaf. Perhaps I twisted the thread after the chain? I'll have to keep any eye on my next set and see if it happens again. If anyone knows what I did that caused this, please let me know.

Well, now that I have the feel of how to tat cluny leaves, I can safely say that many more practice sessions are in order to work on consistency and symmetry.

Because I struggled to learn this technique, I wrote down my own instructions along with a few pictures for future use. I don't want to forget what I did a few months from now if I put it aside for other tatting and try to come back to it later!

As soon as I have finished a motif with cluny leaves, I'll post pictures here and add it to my 25 Motif Challenge.

Don't you think cluny leaves would look fantastic as part of some crazy quilting? I do.

Now it's time to practice, practice, practice.

P.S.
If you've been hesitant like I was to learn how to tat cluny leaves, or tried before and gave up, I say give it another chance. They are beautiful in all of the tatted pieces I've seen and I'm glad to be able to add them to my list of tatting accomplishments.
Tuesday, June 29, 2010

Catching Up On All the Tatting Blogs

I've been tatting away on various projects but none of them are very inspiring right now. I've started and stopped a number of times and just can't seem to decide what I want to work on next.

When all else fails, I tat little butterflies or other small motifs to use up thread left on shuttles. I guess I think if I have empty shuttles, I'll be ready to fill them with beautiful thread for the next tatting project.

Since I haven't figured out what I want to work on, I decided to catch up on all the tatting blogs. Everyone is making such beautiful tatted items and that inspires me. Thank you tatters for posting and sharing your work.

I think I'll check out my pattern books and look online and try something I've never tatted before. One technique that seems very popular right now is cluny tatting. So far I have failed miserably at making clunies so I will look for more info online and perhaps some new videos and give it a try.

Any suggestions on where I might find instructions for making clunies? Videos are great because I'm very much a visual learner. It reminds me of learning to make split rings and split chains. I tried and tried and tried and finally the light went on and I got it. I'm hoping for the same reaction to making clunies!